HOW TO GUIDES

How to Paint a Ceiling
Painting a ceiling can be a real source of anxiety for many people and so it is often left alone. But a fresh coat of paint on the ceiling can transform the way a room feels. Use a fresh light colour to open a space up and make it feel brighter and larger. Use dark or warm colours on your ceiling to create a smaller cosier space. We recommend painting the ceiling first when painting a room. That way any accidental drips will be covered when you paint the walls and trim.
1
Step 1. Protect the area.
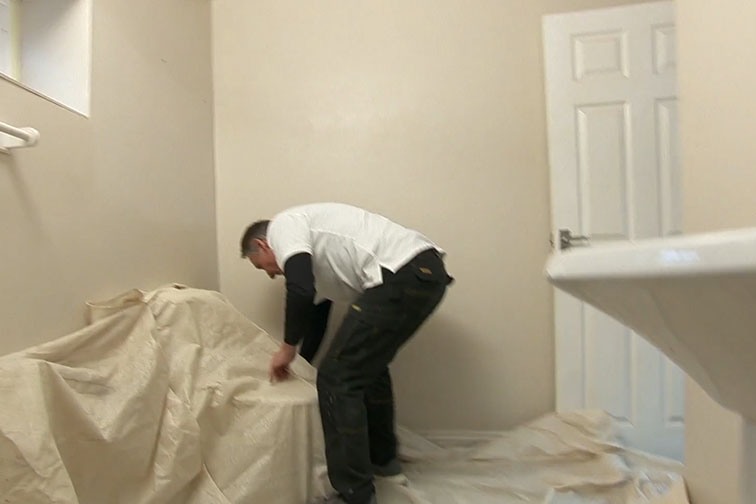
The first step in any decorating task is to protect the area. When painting a ceiling you naturally need to protect the whole room from any paint which might drip down. Move all furniture out of the room and use a Seriously Good Cotton Rich Dust Sheet to cover the floor. We recommend you tape this down to avoid slips using some thick, 48mm Seriously Good UV Resistant Masking Tape. Use the Same tape to cover any details on the ceiling such as light fixtures and taping off areas of the wall ready for cutting in later.
With the room ready you also need to protect yourself. Wear old clothes or a Seriously Good Protective Suit, a hat or cap and some Seriously Good Safety Glasses.
2
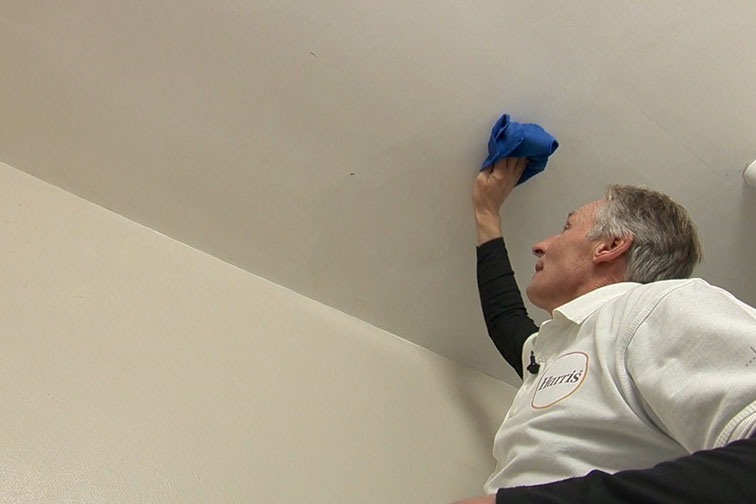
Step 2. Prepare the surface.
Ceilings do not attract as much damage as other parts of the house, but you still might find some small cracks, particularly near architraves. Use a caulking gun and follow our guide to fill any small holes or follow our crack repair guide to fix larger holes. Once the ceiling or surface is prepared you can move on to painting.

3
Step 3. Cut in around ceiling edges.
It’s almost time to start painting. Use some Seriously Good UV Tape to mask of any areas you do not want to paint. Then shake the paint tin vigorously, open and stir if necessary. Pour some emulsion paint of your choice into an Ultimate Small Handyhold and use a Taskmaster Angled Reach Brush to begin cutting in around the architraves and light fixtures.
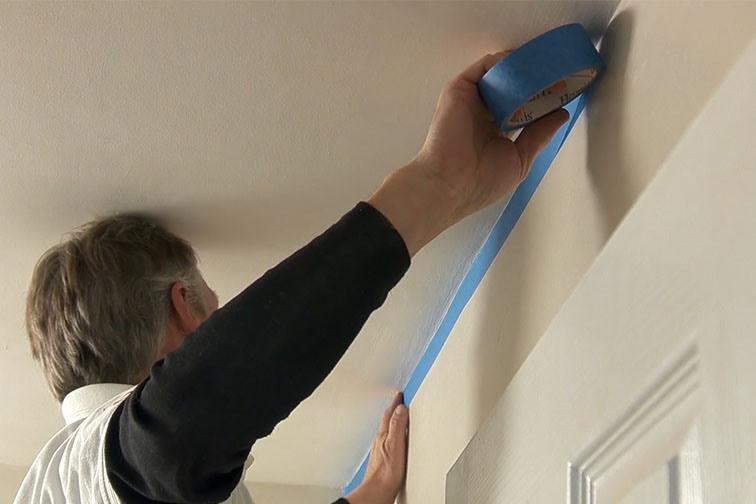

Despite the extra reach from these brushes you will still need to use a ladder. Exercise caution while using the ladder and follow the manufacturers guidelines for use, this might mean you need to move the dust sheet out of the way when using the ladder.

Work in 1m segments as you cut in with the brush. Then switch to a 4 inch roller and use it to bring a fine roller finish right up to the edge of the ceiling. When you have finished painting the edges and detail areas it’s time to move onto rolling the ceiling.
4
Step 4. Paint the ceiling.
It’s time to paint the ceiling! Move the ladder out of the way and quickly rinse out the reach brush and 4-inch roller. Both of these products were developed using easy clean technology and will be clean in a minute or so. Clean the Handyhold as well ready for next time.
Rearrange the dust sheet if you have had to move it while using the ladder. Now for the clever bit. Use the Premier Extension Pole and Taskmaster 9-Inch Roller Set. Work width ways with the first coat, then length ways with the second coat. Apply the paint in a slight W motion using a wet edge technique.
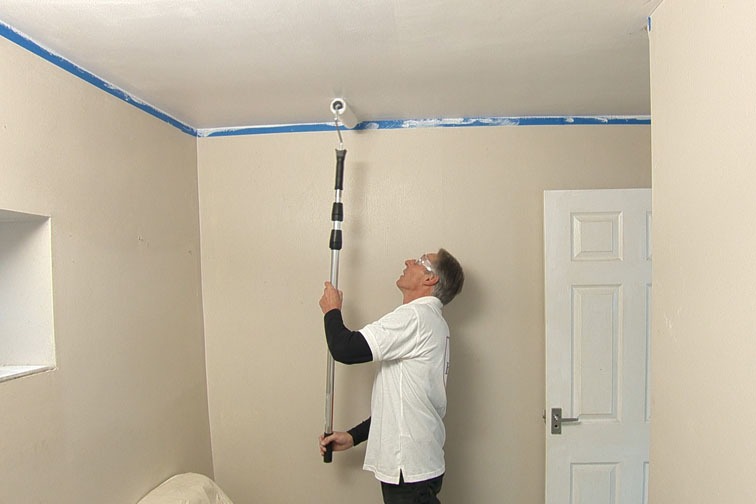
A wet edge technique is when you load your roller up, start 30-40cm away from a painted edge and roll towards the edge in a slight ‘W’ motion. For larger areas repeat this process over and over again working in 1m segments. This technique is great for getting a really smooth finish with one of our ultimate roller sleeves.
5
Step 5. Clean up.
This is usually a frustrating tedious part of the job but not if you have used our Premier or Taskmaster Roller Set and our Taskmaster Angled Reach Brush. Easy clean technology, built into these products means water-based paints such as emulsion paint will rinse out so you can be all cleaned up in the time it takes to make a coffee.
Walls & Ceilings
You might also find these how-to's useful...
How to Prepare a Room for Painting
We made an easy to follow guide showing you how to prepare a room for painting.
How to Repair Peeling Paint on Plaster Walls
In this guide we show you some easy to follow tips and tricks for dealing with flaking paint.
How to Paint New Plaster
Learn how to use a mist coat to paint a newly plastered wall with out using loads of paint.
How to Paint a Wall
In this guide we show you how to get a perfect finish when painting the walls in your home.